ERC1155 tokens are a special kind of digital asset that operate on blockchain networks, and they come with a set of specific rules and features. Think of these tokens as unique items with their own set of properties and abilities within a digital universe. These tokens are not just coins; they can represent ownership, access rights, or any other kind of value.
Smart contracts are crucial in the blockchain world as they are digital agreements that automatically execute and enforce themselves when certain conditions are met. They are like self-operating computer programs that run on the blockchain, facilitating, verifying, or enforcing the negotiation or performance of a contract. ERC1155 tokens and smart contracts share a blueprint or set of instructions that govern their behavior within a blockchain network, ensuring they behave exactly as intended, providing security and trust without requiring intermediaries like banks or third-party entities. They automate processes, reducing errors or fraud, making transactions more efficient and reliable. In essence, smart contracts are the backbone of secure, transparent, and reliable transactions on a blockchain network.
Understanding ERC1155 Standard
The ERC1155 standard in the world of blockchain is like a set of rules that guide how a specific type of digital token should work. It defines the features and functionalities that make these tokens unique. Imagine ERC1155 as a blueprint that helps developers create tokens with special abilities. These tokens offer advantages like increased flexibility and customization. For instance, they allow tokens to change ownership without affecting their other functionalities, making them more adaptable for various purposes. ERC1155 tokens essentially bring extra superpowers to the table, giving users more control and options within the blockchain world.
Requirements
- Image assets for NFTs: To create Non-Fungible Tokens (NFTs), you’ll need digital images or artworks that you want to tokenize. These can be JPEGs, PNGs, or other digital formats representing unique items or collectibles. Each image will be associated with a specific NFT, making it one-of-a-kind and verifiable on the blockchain.
- MetaMask: MetaMask is like a digital wallet that allows you to interact with your blockchain. You’ll need it to simulate transactions and interactions without using real cryptocurrency.
- Knowledge of ERC20 and ERC721 (NFT) token standards: ERC20 and ERC721 are sets of rules or standards for creating tokens on the blockchain. ERC20 tokens are fungible (interchangeable), like regular currencies, while ERC721 tokens, such as NFTs, are non-fungible and unique. Understanding these standards helps in creating, managing, and interacting with tokens following specific guidelines within the blockchain ecosystem.
Step-by-Step Guide for Creating ERC1155 Token Smart Contract
There are various processes involved in deploying an ERC1155 token contract. Before proceeding further make sure you have setup your metamask wallet with your coin network, Here we are already connected to metamask with our newtum coin.
Creating Metadata URI
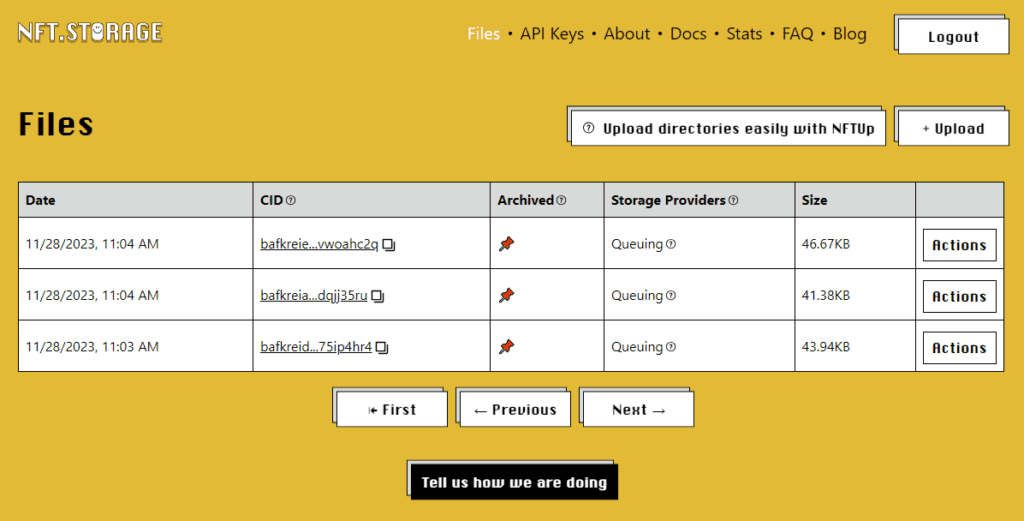
We will create 3 NFT collections (Tulip, Daisy, and Lily) with a single NFT in each one. To upload our files to the decentralized storage IPFS, we can upload them through CLI or use this very easy-to-use tool NFT Storage.
We will be using the second option, NFT Storage. Sign in to NFT Storage and upload your image files for Tulip, Daisy, and Lily. You should see something like this once they’ve been uploaded successfully:
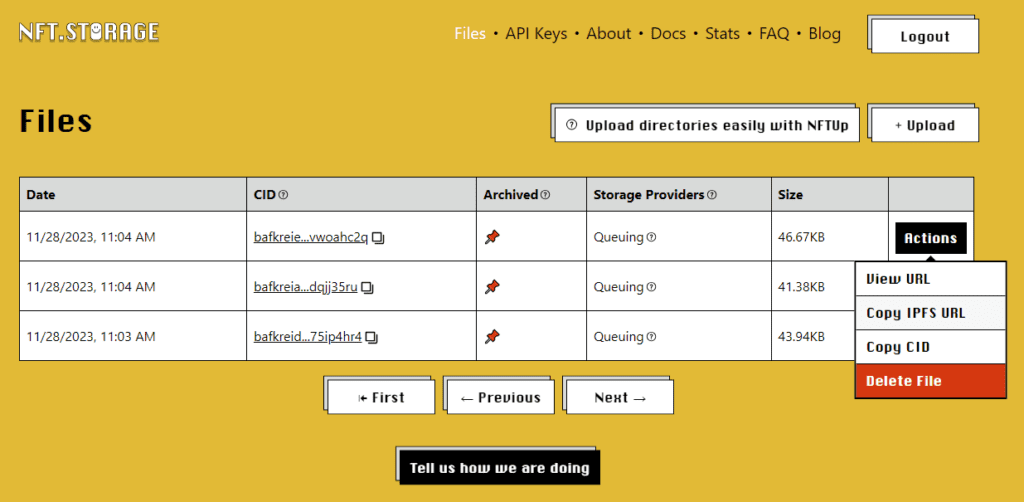
Click on “Actions” and copy the IPFS URL of each image; we will need it for the metadata of each collection.
We will create three JSON metadata files to store information about our NFT collections.
- 1.json: Tulip collection
- 2.json: Daisy collection
- 3.json: Lily collection
Our 1.json file will look something like this:
{ //1.
	"name": "Tulip",
	"description": "This is a collection of Tulip NFTs.",
	"image": "https://ipfs.io/ipfs/bafybeifw6f4xuq3cnephdwogvpn4wdgpngnfosietqhcrhmqfjuihlnw6i",
}
- name: Has the name of the NFT.
- description: Has the description of the NFT.
- image: Has the link to the image we got earlier (IPFS URL).
- If a collection has multiple images, which is usually the case, an extra parameter id is added to differentiate tokens amongst the collection.
Create the remaining JSON files, 2.json and 3.json, for Daisy and Lily collections, respectively.
To efficiently upload all the JSON files to IPFS, we will archive them in content-addressed format. https://car.ipfs.io/ helps archive files in IPFS compatible content-addressed archive (.car) format.
Head over to IPFS CAR and upload all three JSON files. Once uploaded, download the .car file and upload it to NFT Storage. All our JSON files are now stored on IPFS in an archived manner. Copy the IPFS URL of the uploaded .car file, and you should be able to access JSON files by just entering the file name at the end of the URL, for example:
https://ipfs.io/ipfs/bafybeihjjkwdrxxjnuwevlqtqmh3iegcadc32sio4wmo7bv2gbf34qs34a/1.json
Creating & Deploying the ERC1155 Contract
We will use the OpenZeppelin contracts library to create our ERC1155 contract and deploy it using Ethereum REMIX IDE on the your coin..Create a new file, token.sol, in REMIX and paste the following code into it.
// SPDX-License-Identifier: MIT
pragma solidity ^0.8.0;

import "@openzeppelin/contracts/token/ERC1155/ERC1155.sol";

contract tulipLilyDaisy is ERC1155 {
	uint256 public constant Tulip = 1;
	uint256 public constant Daisy = 2;
	uint256 public constant Lily = 3;

	constructor() ERC1155("https://ipfs.io/ipfs/bafybeihjjkwdrxxjnuwevlqtqmh3iegcadc32sio4wmo7bv2gbf34qs34a/{id}.json") {
    	_mint(msg.sender, Tulip, 1, "");
    	_mint(msg.sender, Daisy, 1, "");
    	_mint(msg.sender, Lily, 1, "");
	}
}
Explanation of the code above:
Line 1: Specifying SPDX license type, which is added after Solidity ^0.6.8. Whenever the source code of a smart contract is made available to the public, these licenses can help resolve/avoid copyright issues. If you do not wish to specify any license type, you can use a special value UNLICENSED or simply skip the whole comment (it will not result in an error, just a warning).
Line 2: Declaring the Solidity version.
Line 4: Importing the OpenZeppelin ERC1155 contract.
Lines 6-9: Creating our contract named tulipDaisyLily and creating three variables Tulip, Daisy, and Lily; then assigning proper id to each one of them.
Lines 11-15: Initializing constructor with the link to our car file as a parameter, minting different NFT collections with parameters:
- Address on which tokens will be minted to, msg.sender here means the deployer of the contract.
- Token id, we have already assigned names to token id, so using names here.
- Quantity of each token.
- The last is the data field which is kept empty here.
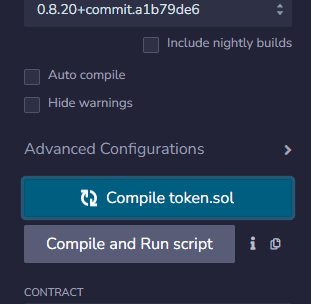
Compile the contract, go to the third tab on the left menu, select Injected Web3 as environment and deploy it by choosing the proper contract name:
Approve the transaction from MetaMask. Once the transaction is complete, your contract will be deployed.
Now you can perform functions like getting the balance of the token by entering the address and token id. We can also retrieve the URI of the token by entering the token id.
we will need to overwrite the URI function to return the file name as a string:
// SPDX-License-Identifier: MIT
pragma solidity ^0.8.0;

import "@openzeppelin/contracts/token/ERC1155/ERC1155.sol";
import "@openzeppelin/contracts/utils/Strings.sol";

contract tulipDaisyLily is ERC1155 {
	uint256 public constant Tulip = 1;
	uint256 public constant Daisy = 2;
	uint256 public constant Lily = 3;

	constructor() ERC1155("https://ipfs.io/ipfs/bafybeihjjkwdrxxjnuwevlqtqmh3iegcadc32sio4wmo7bv2gbf34qs34a/{id}.json") {
    	_mint(msg.sender, Tulip, 1, "");
    	_mint(msg.sender, Daisy, 1, "");
    	_mint(msg.sender, Lily, 1, "");
	}

	function uri(uint256 _tokenid) override public pure returns (string memory) {
    	return string(
        	abi.encodePacked(
            	"https://ipfs.io/ipfs/bafybeihjjkwdrxxjnuwevlqtqmh3iegcadc32sio4wmo7bv2gbf34qs34a/",
            	Strings.toString(_tokenid),".json"
        	)
    	);
	}
}
Additions:
Line 5: Importing an OpenZeppelin contract to convert Integer to String.
Lines 18-25: Overriding the URI function by creating a custom URI function and converting token if from integer to string, then returning the complete URI.
Recompile the contract and deploy it. When you query the contract for URI now, it will return a format.
This guide walks you through the process step-by-step, enabling you to create and deploy ERC1155 tokens while understanding the crucial aspects involved in managing NFT collections on the blockchain.
Creating and deploying ERC1155 token smart contracts in your blockchain empowers you to build versatile decentralized applications. The ERC1155 standard enhances blockchain capabilities, offering flexibility and customization. Embrace this process to unlock the field of possibilities and innovate within your unique blockchain ecosystem.