In this blog post, we’ll walk through the process of setting up SSL (Secure Socket Layer) on a specific port for a domain, utilizing a proxy server and a free SSL certificate service like ZeroSSL. SSL is crucial for securing online transactions, encrypting data, and boosting trust between users and websites. So, let’s dive into the steps required to make this happen without drowning in technical jargon.
Table of Contents
Domain/Sub Domain Pointing of your Domin Name
You can purchase a domain from anywhere or you can your user’s existing subdomain.
To configure your domain or subdomain:
- Login to DNS provider: Access provider’s site, log in.
- Access DNS Settings: Find DNS management in your account.
- Choose Domain: Select the domain.
- Select Record Type: Choose record type (“A” for main domain), input subdomain as “rpc” or “@” for main domain.
- Enter Details: Add IP address for “A” records.
- Save Changes: Save modifications.
- Propagation Time: Changes propagate in minutes to 48 hours.
- Verify Configuration: Test domain/subdomain in a browser post-propagation.
Remember, the actual steps might slightly vary depending on your DNS provider’s interface, but this general process should help you set up DNS records for your domain or subdomain.
Installing Apache
1. Launch your Server: Go to WinSCP, login to your server and connect to PuTTY terminal.
2. Install Apache: Run commands in your PuTTY terminal to install Apache and enable the necessary modules.
sudo apt update
sudo apt install apache2
sudo a2enmod rewrite ssl proxy proxy_http proxy_balancer lbmethod_byrequests
Configure Proxy Domain
1. Configure Proxy Domain: Create a configuration file for your domain in the Apache sites-available directory using the provided template, ensuring to modify it with your specific domain information.
cd /etc/apache2/sites-available

sudo vi rpc.newtumscan.com.conf
Inside the file, input the following configuration:
<VirtualHost *:80>

        ServerAdmin webmaster@rpc.newtumscan.com
        ServerName rpc.newtumscan.com
        ServerAlias rpc.newtumscan.com
        DocumentRoot /var/www/html/

        ErrorLog ${APACHE_LOG_DIR}/error.log
        CustomLog ${APACHE_LOG_DIR}/access.log combined

        ProxyPreserveHost On
        ProxyRequests Off
        ProxyPass / http://localhost:8545/
        ProxyPassReverse / http://localhost:8545/

</VirtualHost>
Replace ‘rpc.newtumscan.com‘ with your specific domain name. Exit the editor.
2. Enable Proxy Configuration: Activate the proxy configuration using commands in the terminal and restart Apache to apply changes.
sudo a2ensite rpc.newtumscan.com.conf

sudo systemctl restart apache2
Generate SSL Certificate with ZeroSSL
1. Visit ZeroSSL: Go to ZeroSSL’s website and follow the steps to generate a free SSL certificate for your domain.
Go to https://zerossl.com/ to get started.
2. Select “Get Free SSL.”
3. Click “Next Step” after adding your details.
4. After selecting “New Certificate”, input “your domain name”.
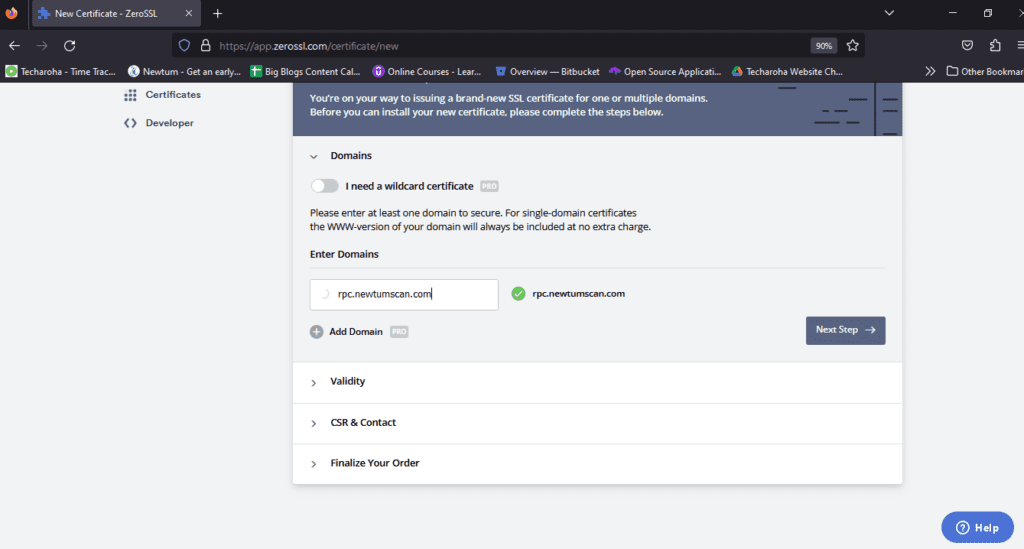
5. Choose a “90-Day Certificate” validity period.
6. Keep the “CSR and contact” information as they are and click “Next Step”.
7. Keep the default of $0 per month in “Finalise Your Order” and click “Next Step”.
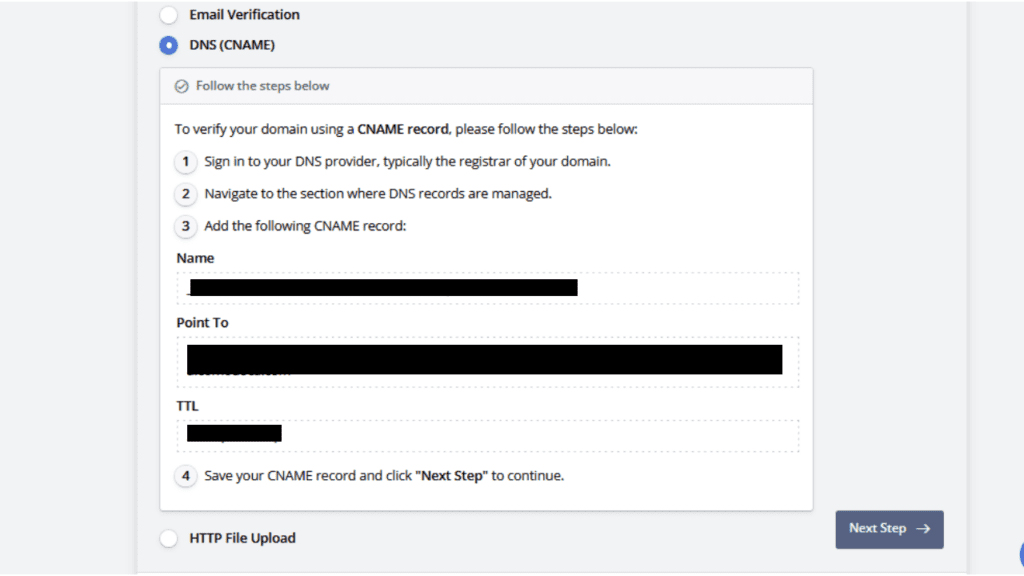
8. Next, you need to decide which verification method to use.
Choose the “DNS (CNAME)” technique, which is what we’ll be using.
Verify Certificate
- Log in to your DNS provider’s platform.
- Access the DNS Record section.
- Click “Add new Record” and choose the record type as “CNAME”.
- Enter the required details like Name and Point To based on the information provided by ZeroSSL.
- Select “Custom” from the TTL dropdown and input the specified value.
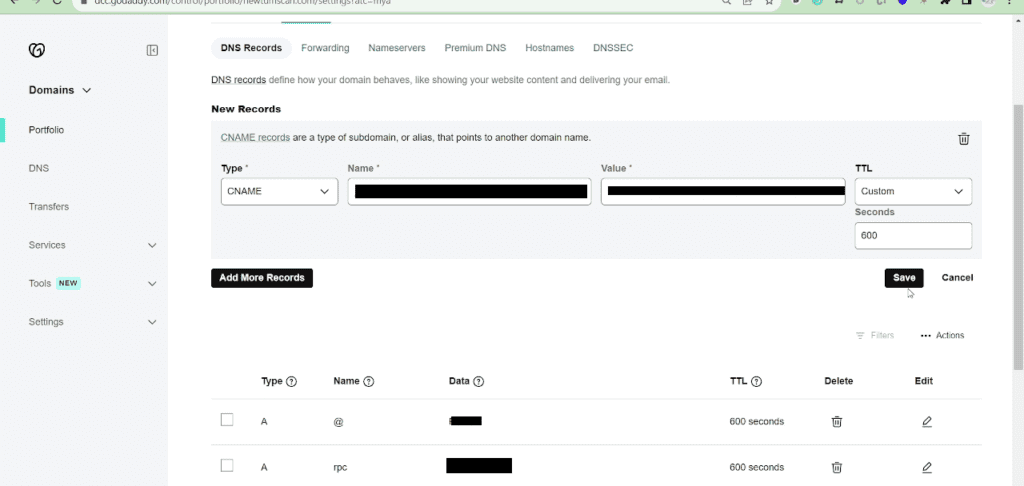
- Save the record and Confirm the changes by selecting “Yes” and wait for the record to be saved.
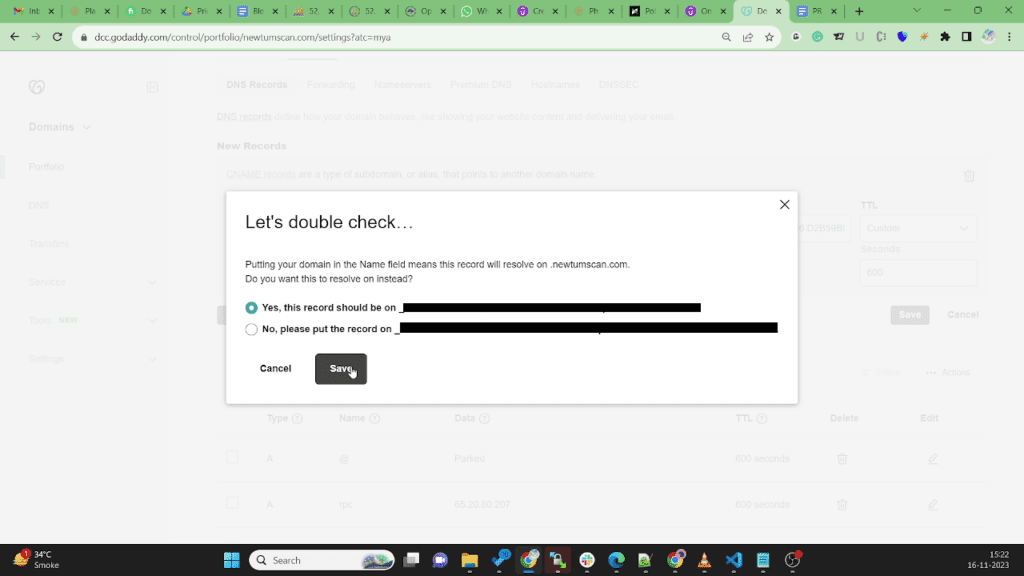
- Return to the ZeroSSL dashboard and click on “Verify Domain”.
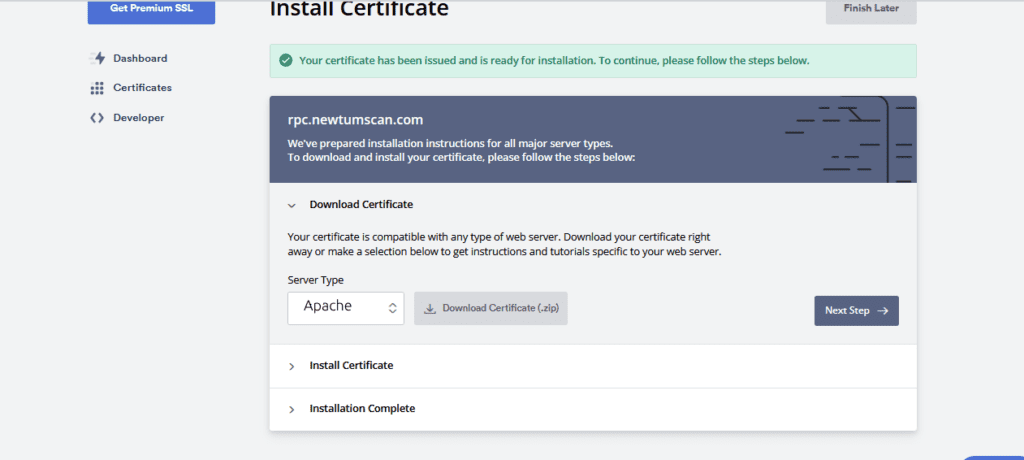
- Upon successful verification, you’ll be directed to the certificate installation page.
- In the download certificate section, opt for “Apache” as the server type and download the certificate as a zip folder.
- Extract the contents of the downloaded zip folder.
HTTPS Configuration
1. Launch WinSCP and connect to your server.
2. Locate and open the /etc/ssl/ directory in WinSCP.
3. Right-click inside the /etc/ssl/ directory and select “New” -> “Directory”.
Name the directory with your domain name (e.g., rpc.newtumscan.com) and press “OK” to create it.
4. Copy and paste the SSL certificate files (certificate.crt, private.key, ca_bundle.crt) into the newly created directory (/etc/ssl/rpc.newtumscan.com/).
5. Open the terminal via PuTTY
6. Use the following command to open your.conf file (rpc.newtumscan.com.conf) after opening the Putty terminal.
sudo vi rpc.newtumscan.com.conf
The text below has to be changed to match your domain. Replace rpc.newtumscan.com. with your domain name.
<VirtualHost *:443>
    	ServerAdmin webmaster@rpc.newtumscan.com
        ServerName rpc.newtumscan.com
        ServerAlias www.rpc.newtumscan.com

        SSLEngine on
        SSLCertificateFile /etc/ssl/rpc.newtumscan.com/certificate.crt
        SSLCertificateKeyFile /etc/ssl/rpc.newtumscan.com/private.key
        SSLCertificateChainFile /etc/ssl/rpc.newtumscan.com/ca_bundle.crt

        ErrorLog ${APACHE_LOG_DIR}/error.log
        CustomLog ${APACHE_LOG_DIR}/access.log combined

        ProxyPreserveHost On
        ProxyRequests Off
        ProxyPass / http://localhost:8545/
        ProxyPassReverse / http://localhost:8545/


</VirtualHost>
3. restart apache using below command.
sudo systemctl restart apache2
4. Click the Check Installation button on your ZeroSSL dashboard.
5. Congratulations if it indicates that the installation is finished! You have installed your SSL certificate.
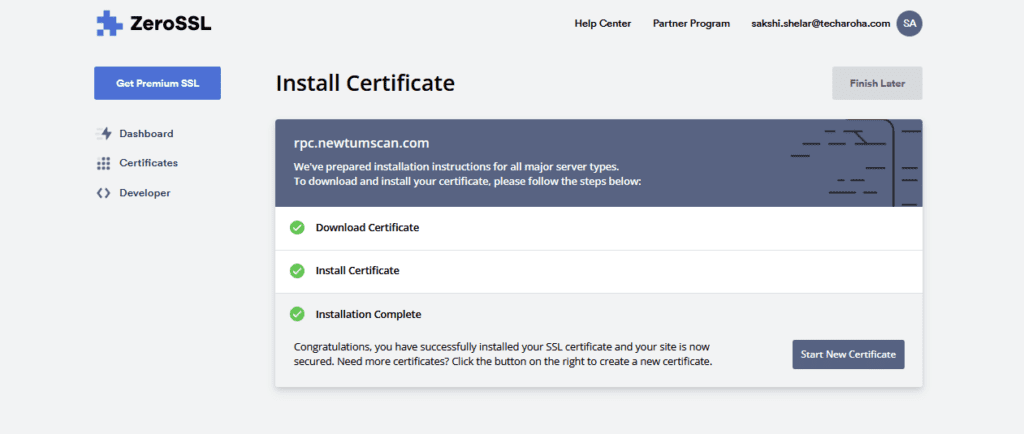
You can now securely access your domain using the HTTPS protocol.
By following these steps, you’ve successfully set up SSL on your domain using a proxy server and a free SSL certificate from ZeroSSL. This ensures a secure connection for your website visitors, improving trust and security. Now, your domain should be accessible via HTTPS. Congratulations on securing your domain!