AWS EC2 is a popular cloud computing solution for hosting virtual servers, offering flexibility and scalability. Nonetheless, PuTTY is an effective tool that enables direct control and command execution for individuals who need to know the specifics of their server. This blog will help non-techies manage servers more easily by walking users through the straightforward procedure of connecting to their EC2 instance using PuTTY.
Prerequisites
Let’s make sure we have everything we need before we start using PuTTY to access the AWS EC2 server terminal:
1. Valid AWS Account: Make sure your AWS account is active. If not, go to aws.amazon.com, create an account, and follow the simple instructions to get going.
2. Up and Running EC2 Instance: Ensure that an EC2 instance is operational. See our guide on “Setup Ubuntu Server in AWS – Step-by-Step” if you need help with this. It divides the procedure into easy-to-follow steps.
3. WinSCP and PuTTY Installed: Download and install WinSCP and PuTTY on your local machine. These tools will be our companions in this journey, allowing for a seamless connection to your EC2 instance.
And if you haven’t Installed WinSCP , our step-by-step guide is just a click away for your convenience.
Also for PuTTY installation Click Here.
Accessing PuTTY through WinSCP
Step to connect to PuTTY with EC2 Instance:
1. Connect to AWS EC2 instance using WinSCP.
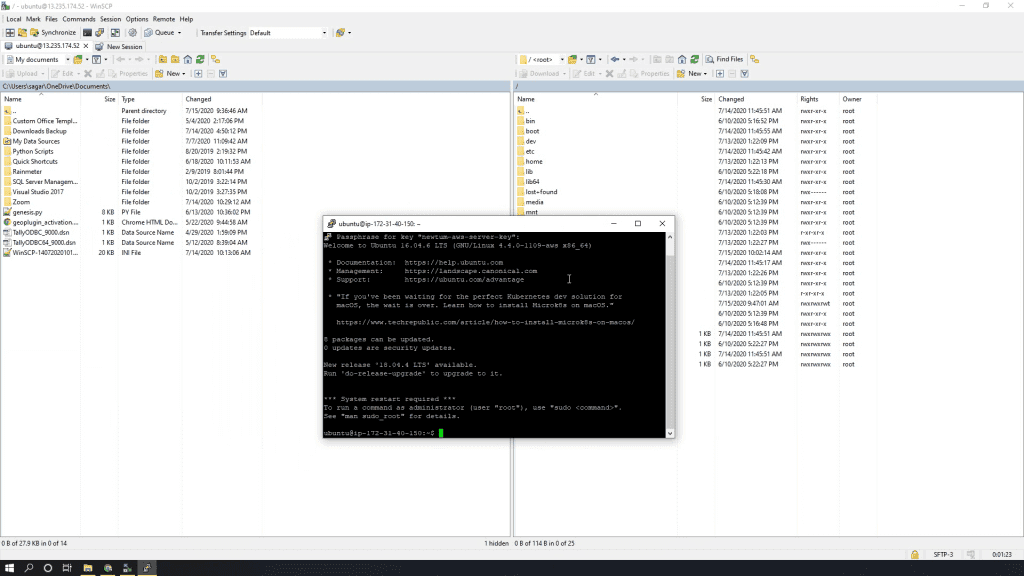
2. Go to the Commands menu, and choose the “Open in PuTTY” option from the list. You can also use “Ctrl + P” as a keyboard shortcut.

3. Enter the passphrase in PuTTY command prompt, hit Enter.
4. You are now connected to EC2 instance server command line using PuTTY.
Connecting to your AWS EC2 server terminal with PuTTY is a walk in the cloud. With WinSCP’s simple steps, command line navigation becomes a breeze, catering to users without tech-savvy skills. Experience a smooth journey in managing your EC2 instance.