PuTTY is a crucial tool in server management, facilitating easy access to remote servers. It is especially important in the context of cryptocurrency, where decentralized cryptocurrencies like ETH and BNB require robust remote access tools. PuTTY’s versatility and user-friendly interface make it an essential asset for those involved in cryptocurrency server administration.
With PuTTY, users can securely connect to their cryptocurrency servers and perform various administrative tasks such as configuring settings, troubleshooting issues, and monitoring server performance. Its compatibility with different operating systems further enhances its usefulness in managing cryptocurrency servers efficiently. Additionally, PuTTY’s ability to handle multiple simultaneous connections makes it a valuable tool for cryptocurrency enthusiasts managing multiple servers simultaneously.
Prerequisites
To install PuTTY, ensure your system is compatible with the software on Windows, Linux, and macOS, and meets minimum requirements. Ensure you have administrative privileges to install software, as this is crucial for configuring settings and establishing secure connections. This proactive approach ensures a smooth installation process and seamless remote server management across different environments.
Explore the fascinating world of Buying and Setting up Server Check out!
Installing PuTTY in Windows
Let’s dive into the step-by-step process of downloading PuTTY from the official website for Windows, paving the way for seamless server connectivity and cryptocurrency building.
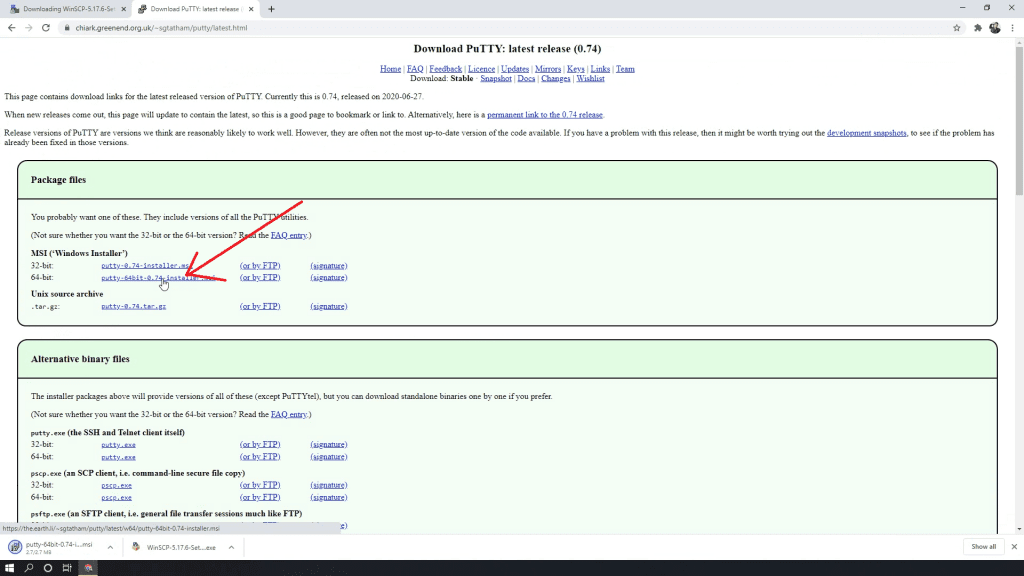
1. Begin by downloading the PuTTY installation package from the official link: PuTTY Download. It’s crucial to select the right installation package from the myriad of options available. The image below highlights the recommended choice.
2. After the download is complete, run the setup file that you obtained.
3. During the installation process, keep the default selections unchanged and proceed with the installation. This ensures a standard and reliable setup for your PuTTY installation.
4. Once the installation is successfully completed, click on the “Finish” button to conclude the setup process.
Now that PuTTY has been installed on your Windows computer, you can use it to establish connections with servers. PuTTY will be used to run commands on the server in the later parts of our cryptocurrency course, and it will be essential to the development and administration of our cryptocurrency projects.
Mastering PuTTY is crucial for seamless server management in our cryptocurrency course. With this step-by-step guide, you’re now equipped to efficiently connect to both Vultr and AWS instances. Embrace the power of remote access and take your server administration skills to the next level.